Secure and TAP-less Onboarding with Verified ID
 Samuel Eng
New hires usually start with a password or a Temporary Access Pass (TAP) that someone has to hand over. With Lifecycle Workflows and Verified ID, the new hire verifies their identity themselves and registers a passkey in Microsoft Authenticator. No password, no TAP, and no helpdesk call.
How it works
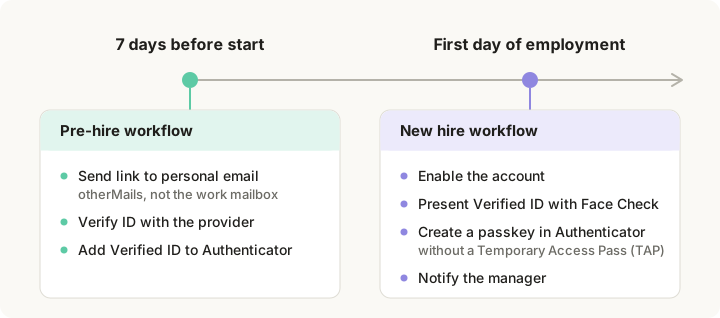
- Before day one: a pre-hire workflow emails an identity verification link to the user's personal email address. The user verifies with an identity verification provider and adds the Verified ID to Microsoft Authenticator. The experience is very similar to the one in Get a Verified ID from an Identity Verification Provider.
- On day one: a new hire workflow enables the account and sends a second link. The user presents the Verified ID with Face Check and creates a passkey in Microsoft Authenticator. The manager gets an email when the user is verified.
Prerequisites
- Licenses: Microsoft Entra ID Governance or Microsoft Entra Suite for Lifecycle Workflows, and Face Check, which is included in Microsoft Entra Suite.
- An identity verification provider from the Microsoft Security Store. Onboarding doesn't support tenant-issued credentials.
- An identity verification profile with the purpose Onboarding or All, in Production, that targets a group with your new hires. See How to Create an Identity Verification Profile.
- Passkeys without attestation: In Entra ID → Authentication methods → Policies → Passkey (FIDO2), enable passkeys for the new hires and clear Enforce attestation in their passkey profile. At the time of writing, a profile that enforces attestation blocks passkeys in Microsoft Authenticator in this flow. See Synced vs Device-Bound Passkeys: A Practical Guide.
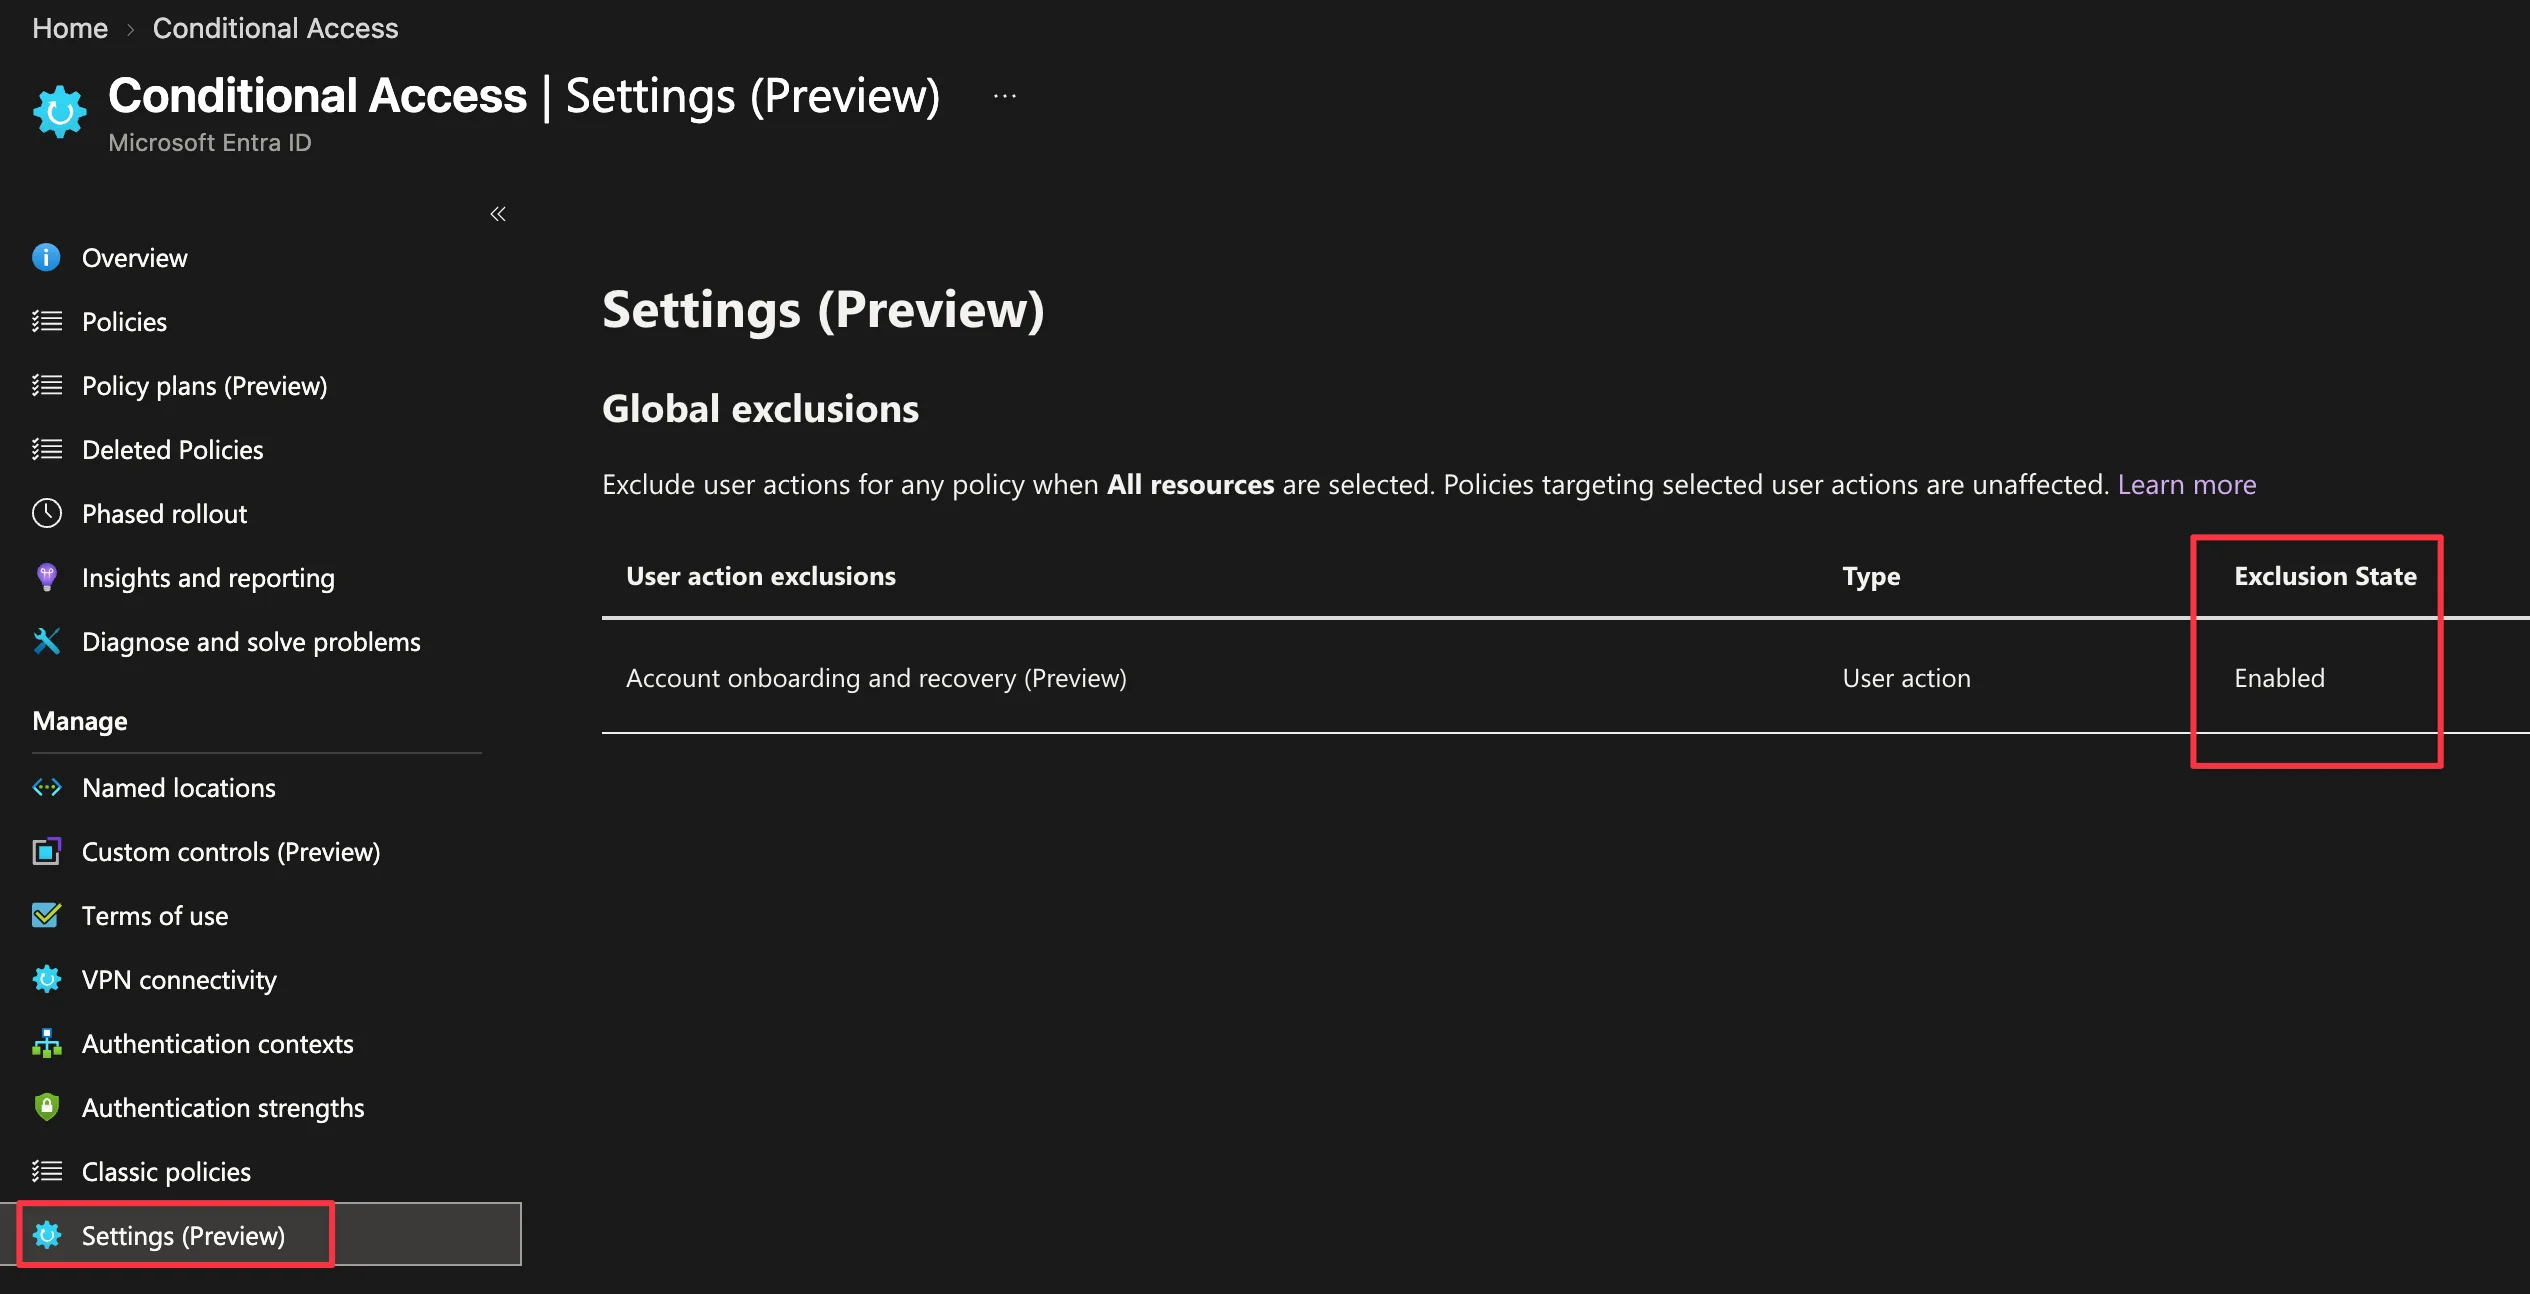
- Conditional Access exclusion: Policies that target All resources also apply to onboarding, so a policy that requires a compliant device, for example, blocks it. In Conditional Access → Settings (Preview), set the Account onboarding and recovery exclusion to Enabled. This also applies to account recovery. To still control onboarding, create a separate policy that targets that user action.
- The new hire's user account:
- Is disabled until day one, for example when HR provisioning creates it. The new hire workflow enables it.
- Has First name and Last name that match their identity document.
- Has exactly one address in otherMails (Other emails in the admin center): their personal email. The workflows only use the first address, and fail if it's empty.
- Has employeeHireDate and a Manager set.
1. Create the pre-hire workflow
- In the Microsoft Entra admin center, go to ID Governance → Lifecycle workflows → Workflows → Create workflow.
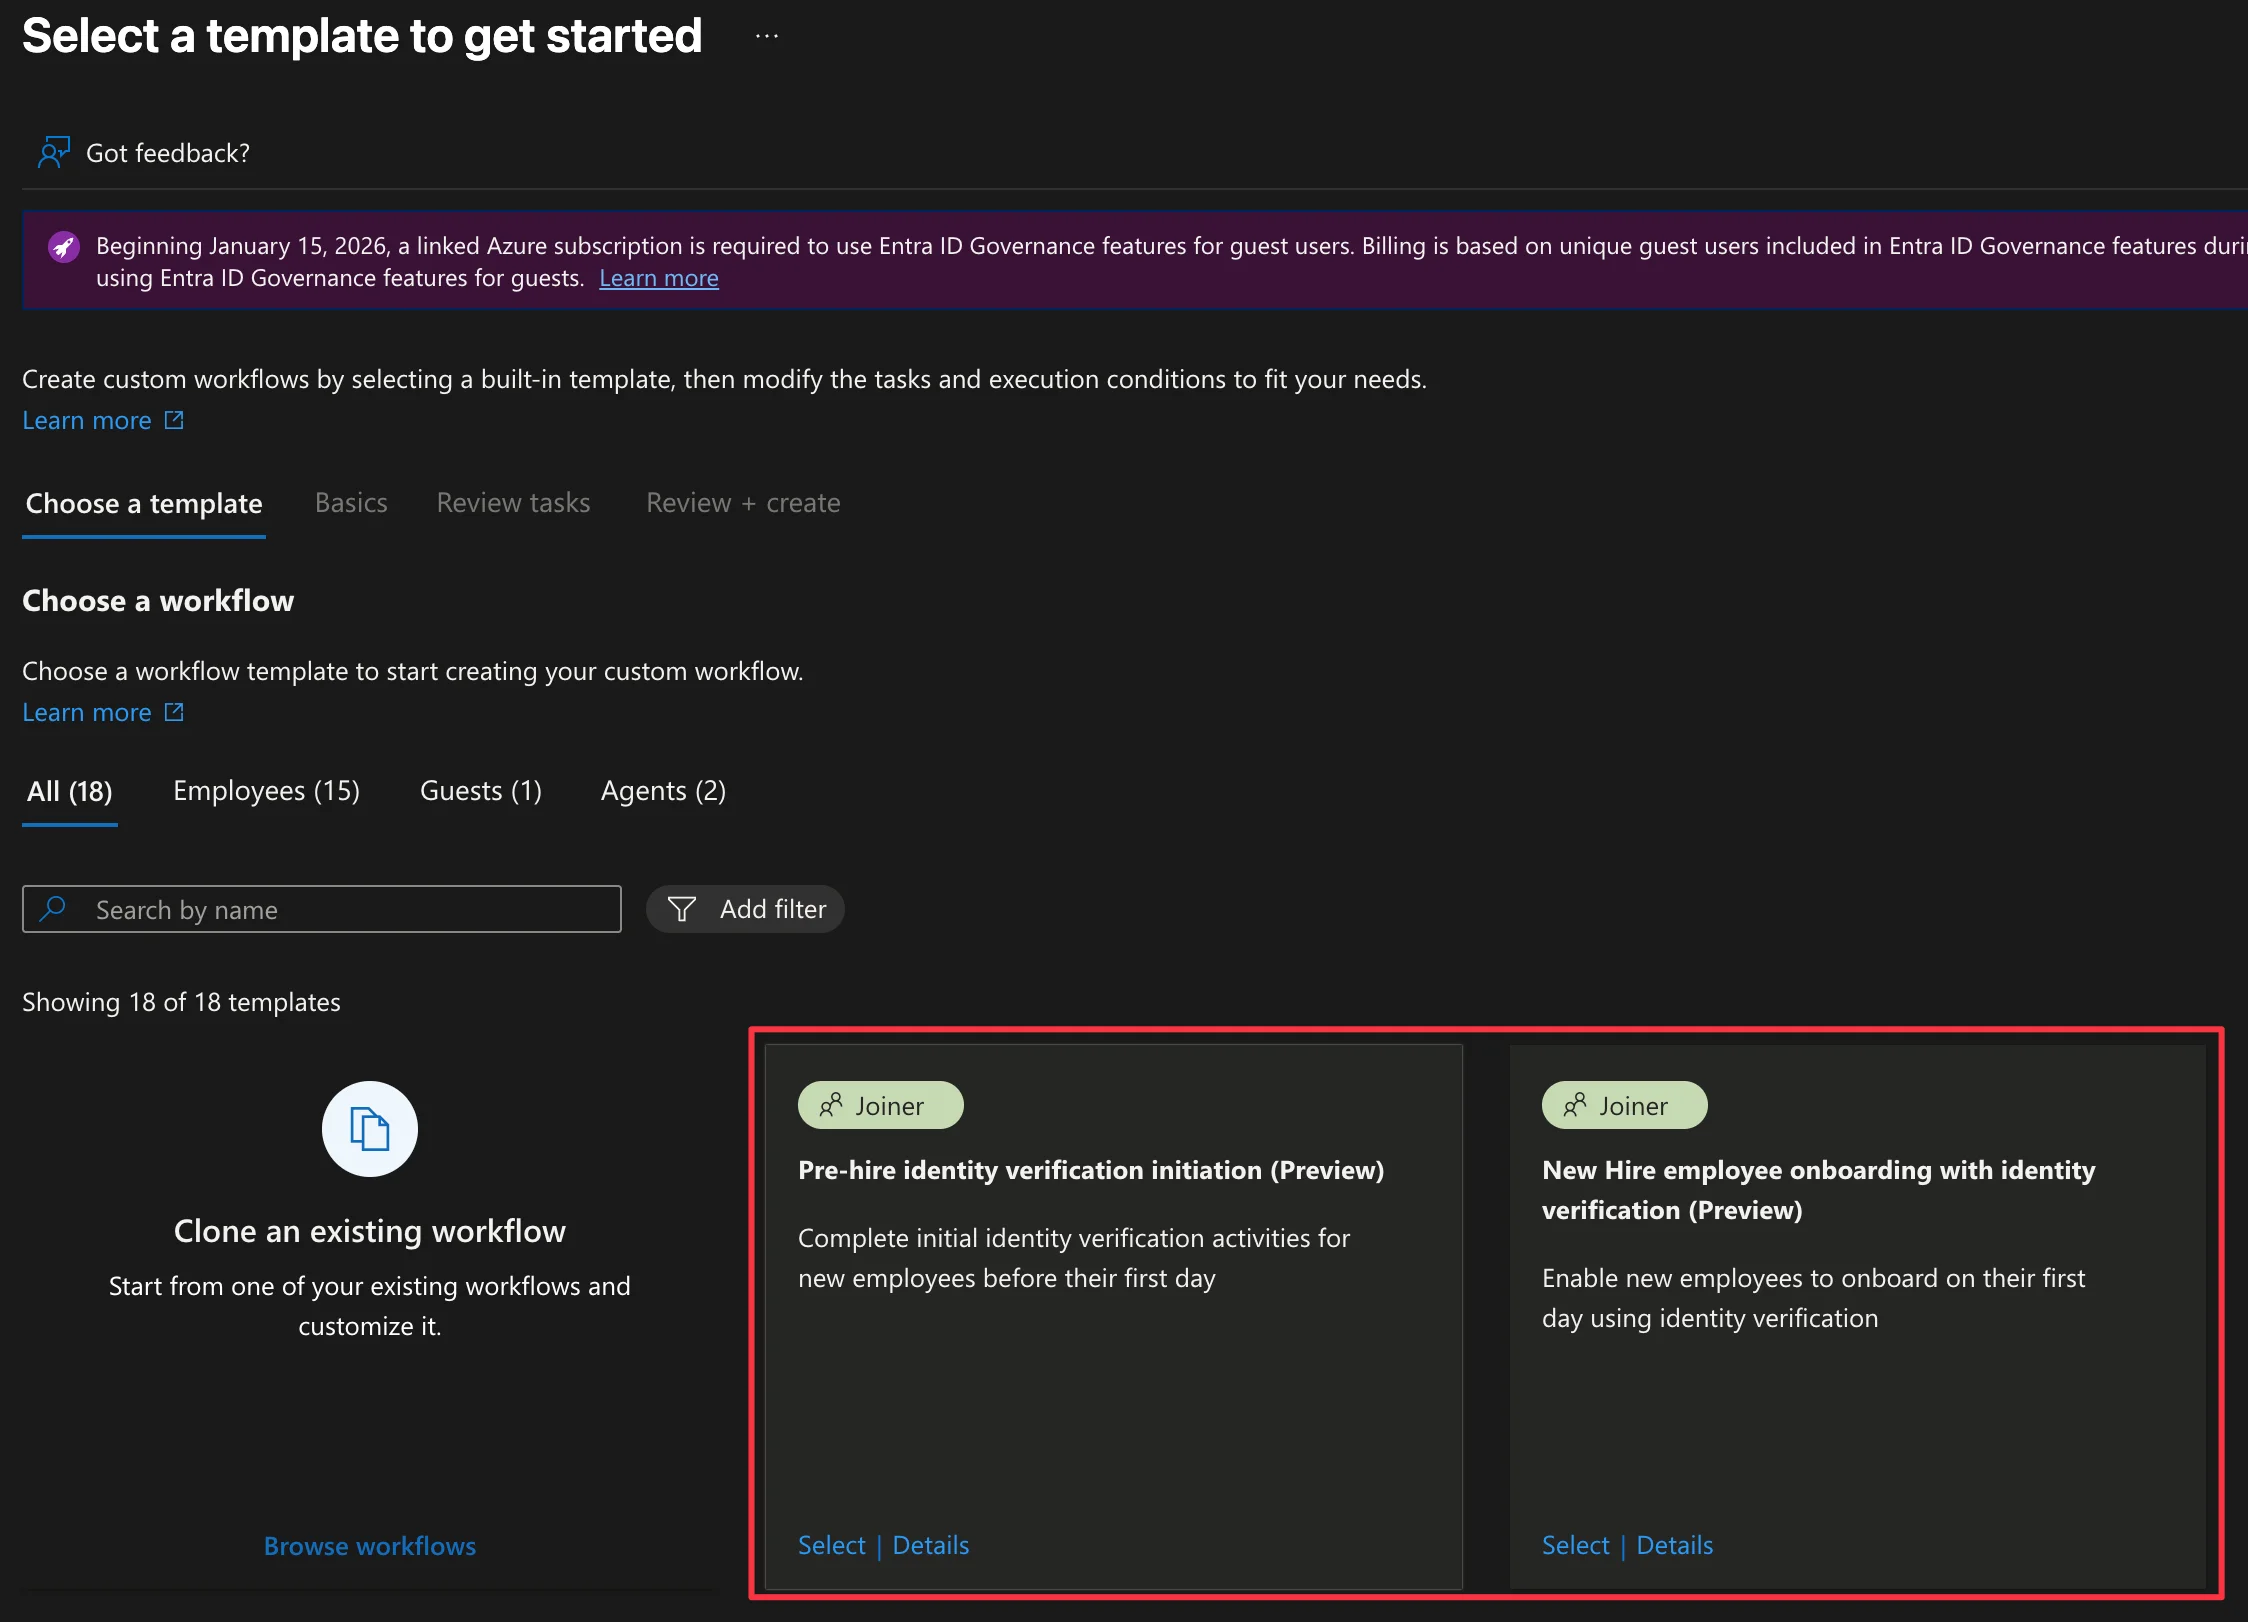
- Select Pre-hire identity verification initiation (Preview).
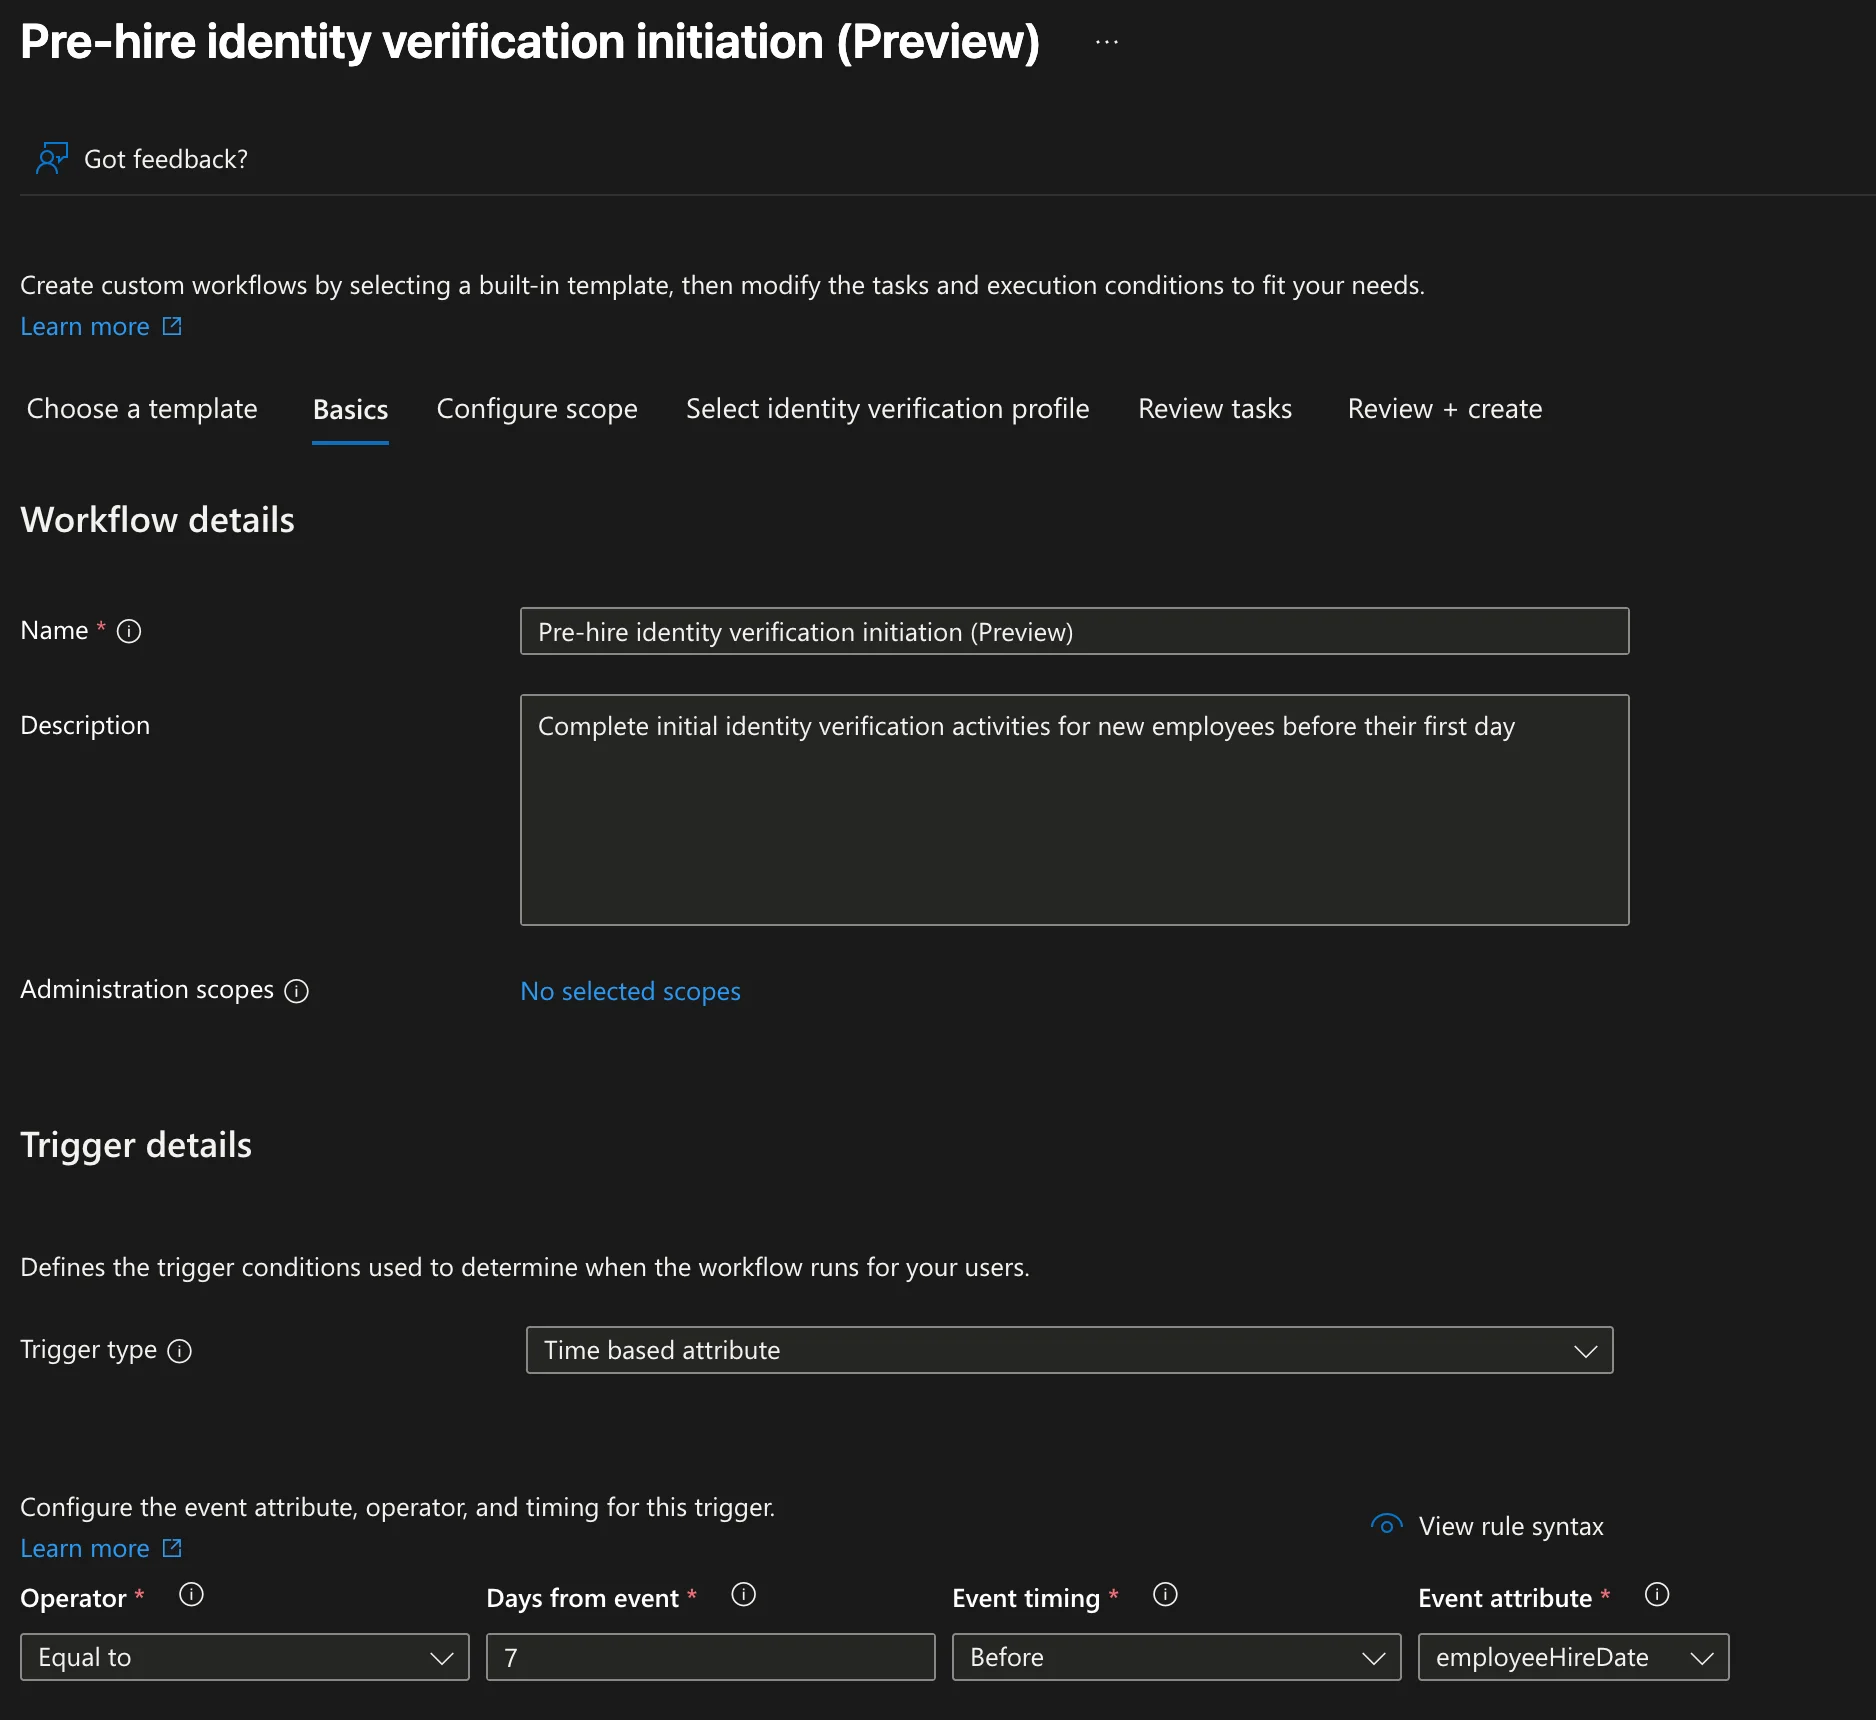
- Basics: Set the trigger, for example 7 days before employeeHireDate.
TIP
Both the timing and the email are yours to adjust. Change Days from event to send the email earlier or later, and edit the email text to fit your organization.
- Configure scope: Select the users the workflow applies to, for example by department or a test attribute.
- Select identity verification profile: Select your onboarding profile.
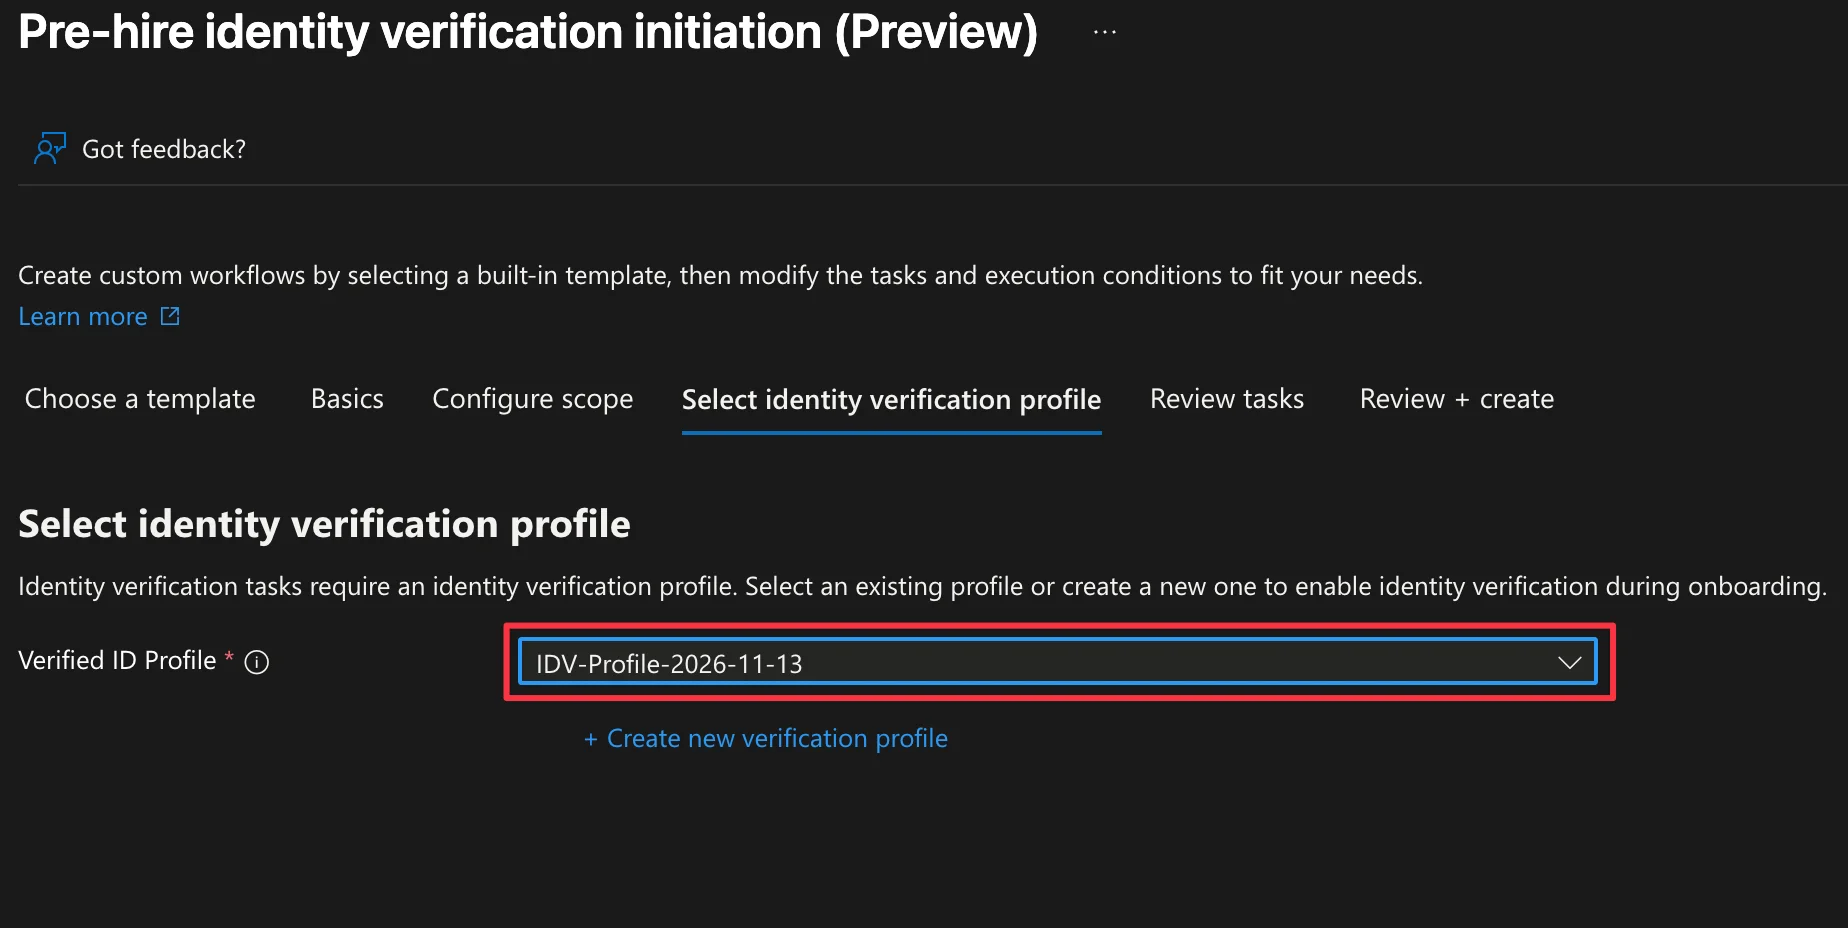
- Review tasks: The template has one task, which sends the identity verification link. Confirm that the recipient is otherMails.
- Review + create.
2. Create the new hire workflow
Create a second workflow from New Hire employee onboarding with identity verification (Preview). Select the same scope and profile. The template has three tasks:
- Enable User Account
- Send Identity verification link (Preview)
- Send manager verification status email (Preview)
Keep the trigger on employeeHireDate. The new hire workflow expects the user to have finished the pre-hire step.
3. Test, then enable the schedule
Instead of waiting for the hire date, open each workflow and select Run on demand for your test user. Run the pre-hire workflow first, let the user complete it, then run the new hire workflow. Check the result of each task in Workflow history.
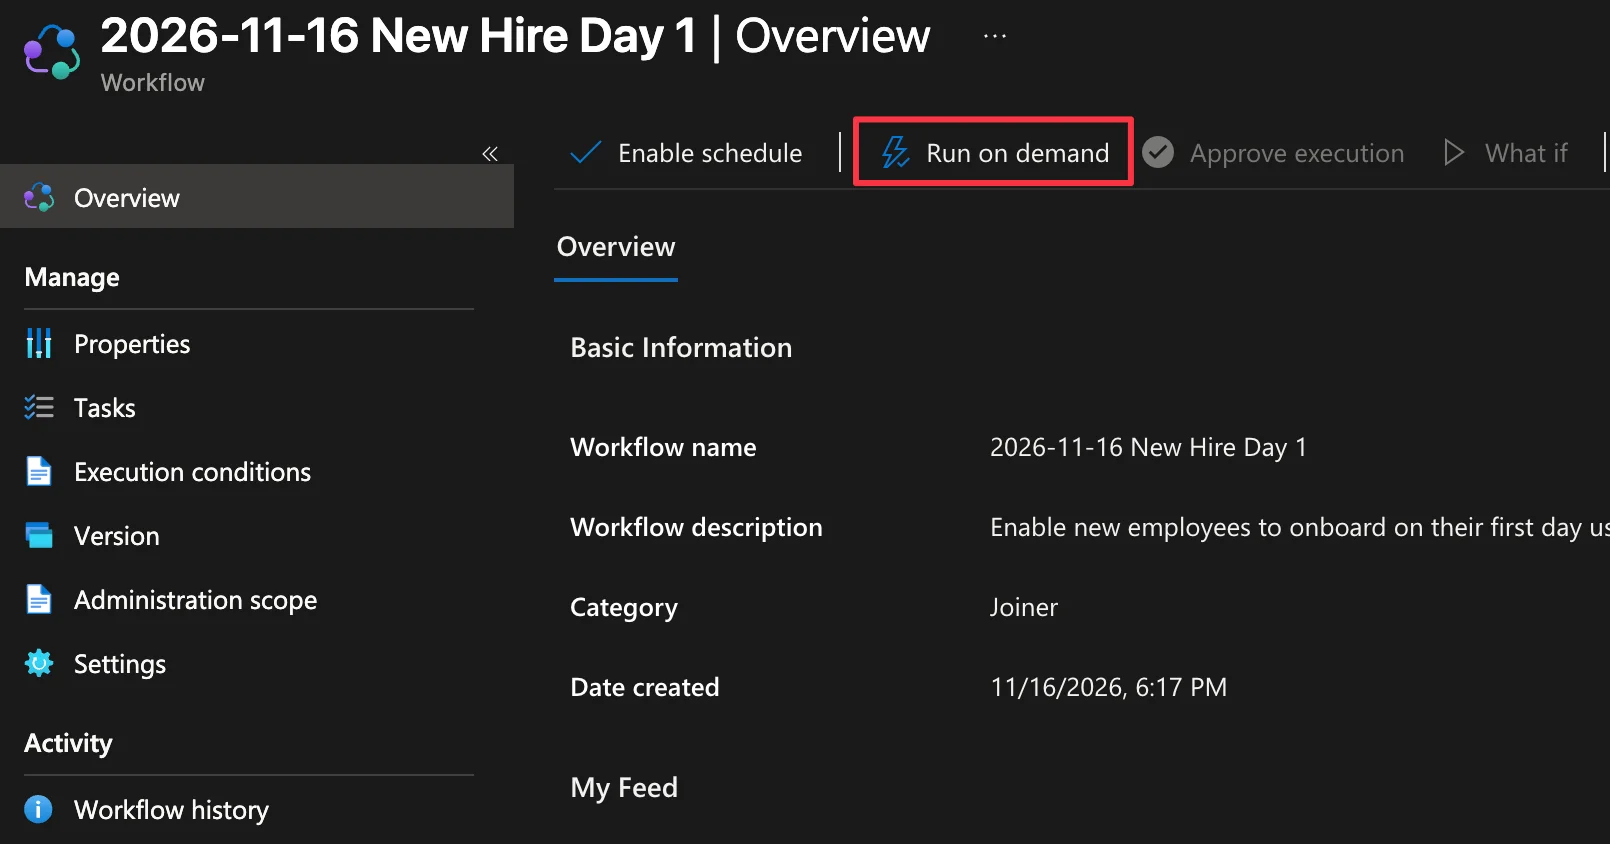
When the test works, select Enable schedule on both workflows. Until you do, they only run on demand.
What to expect
NOTE
Pre-hire workflow: The user opens the link in the email and gets a Verified ID from the identity verification provider. The steps are very similar to the ones in Get a Verified ID from an Identity Verification Provider.
NOTE
New hire workflow: On day one, the user opens the second link and presents the Verified ID with Face Check, much like in Present a Verified ID When Required. Then they create a passkey in Microsoft Authenticator.