How to Create an Identity Verification Profile
 Samuel Eng
An identity verification profile is the configuration object in Microsoft Entra ID that defines how identity verification works for a group of users. A profile controls which users are in scope, which verification method or provider performs the verification, and how the verified identity claims are matched against the user's account. You can create several profiles, for example with different providers or matching rules for different user populations. If a user is in scope of more than one profile, the first match in priority order applies.
The profile defines how a user is verified. Something else decides when: account recovery, onboarding, or a Conditional Access policy that requires identity verification, such as on a SharePoint site. Verified ID proves who the user is, but it can't be used to sign in or to satisfy MFA or SSPR.
Prerequisites
- Licenses: Microsoft Entra ID P1, and a Face Check license, which is included in Microsoft Entra Suite or available on its own.
- Roles: Authentication Administrator in Microsoft Entra ID, and Contributor or Billing Administrator on the Azure subscription you use for the provider. See Microsoft Learn: prerequisites.
- A decision on how users will prove their identity:
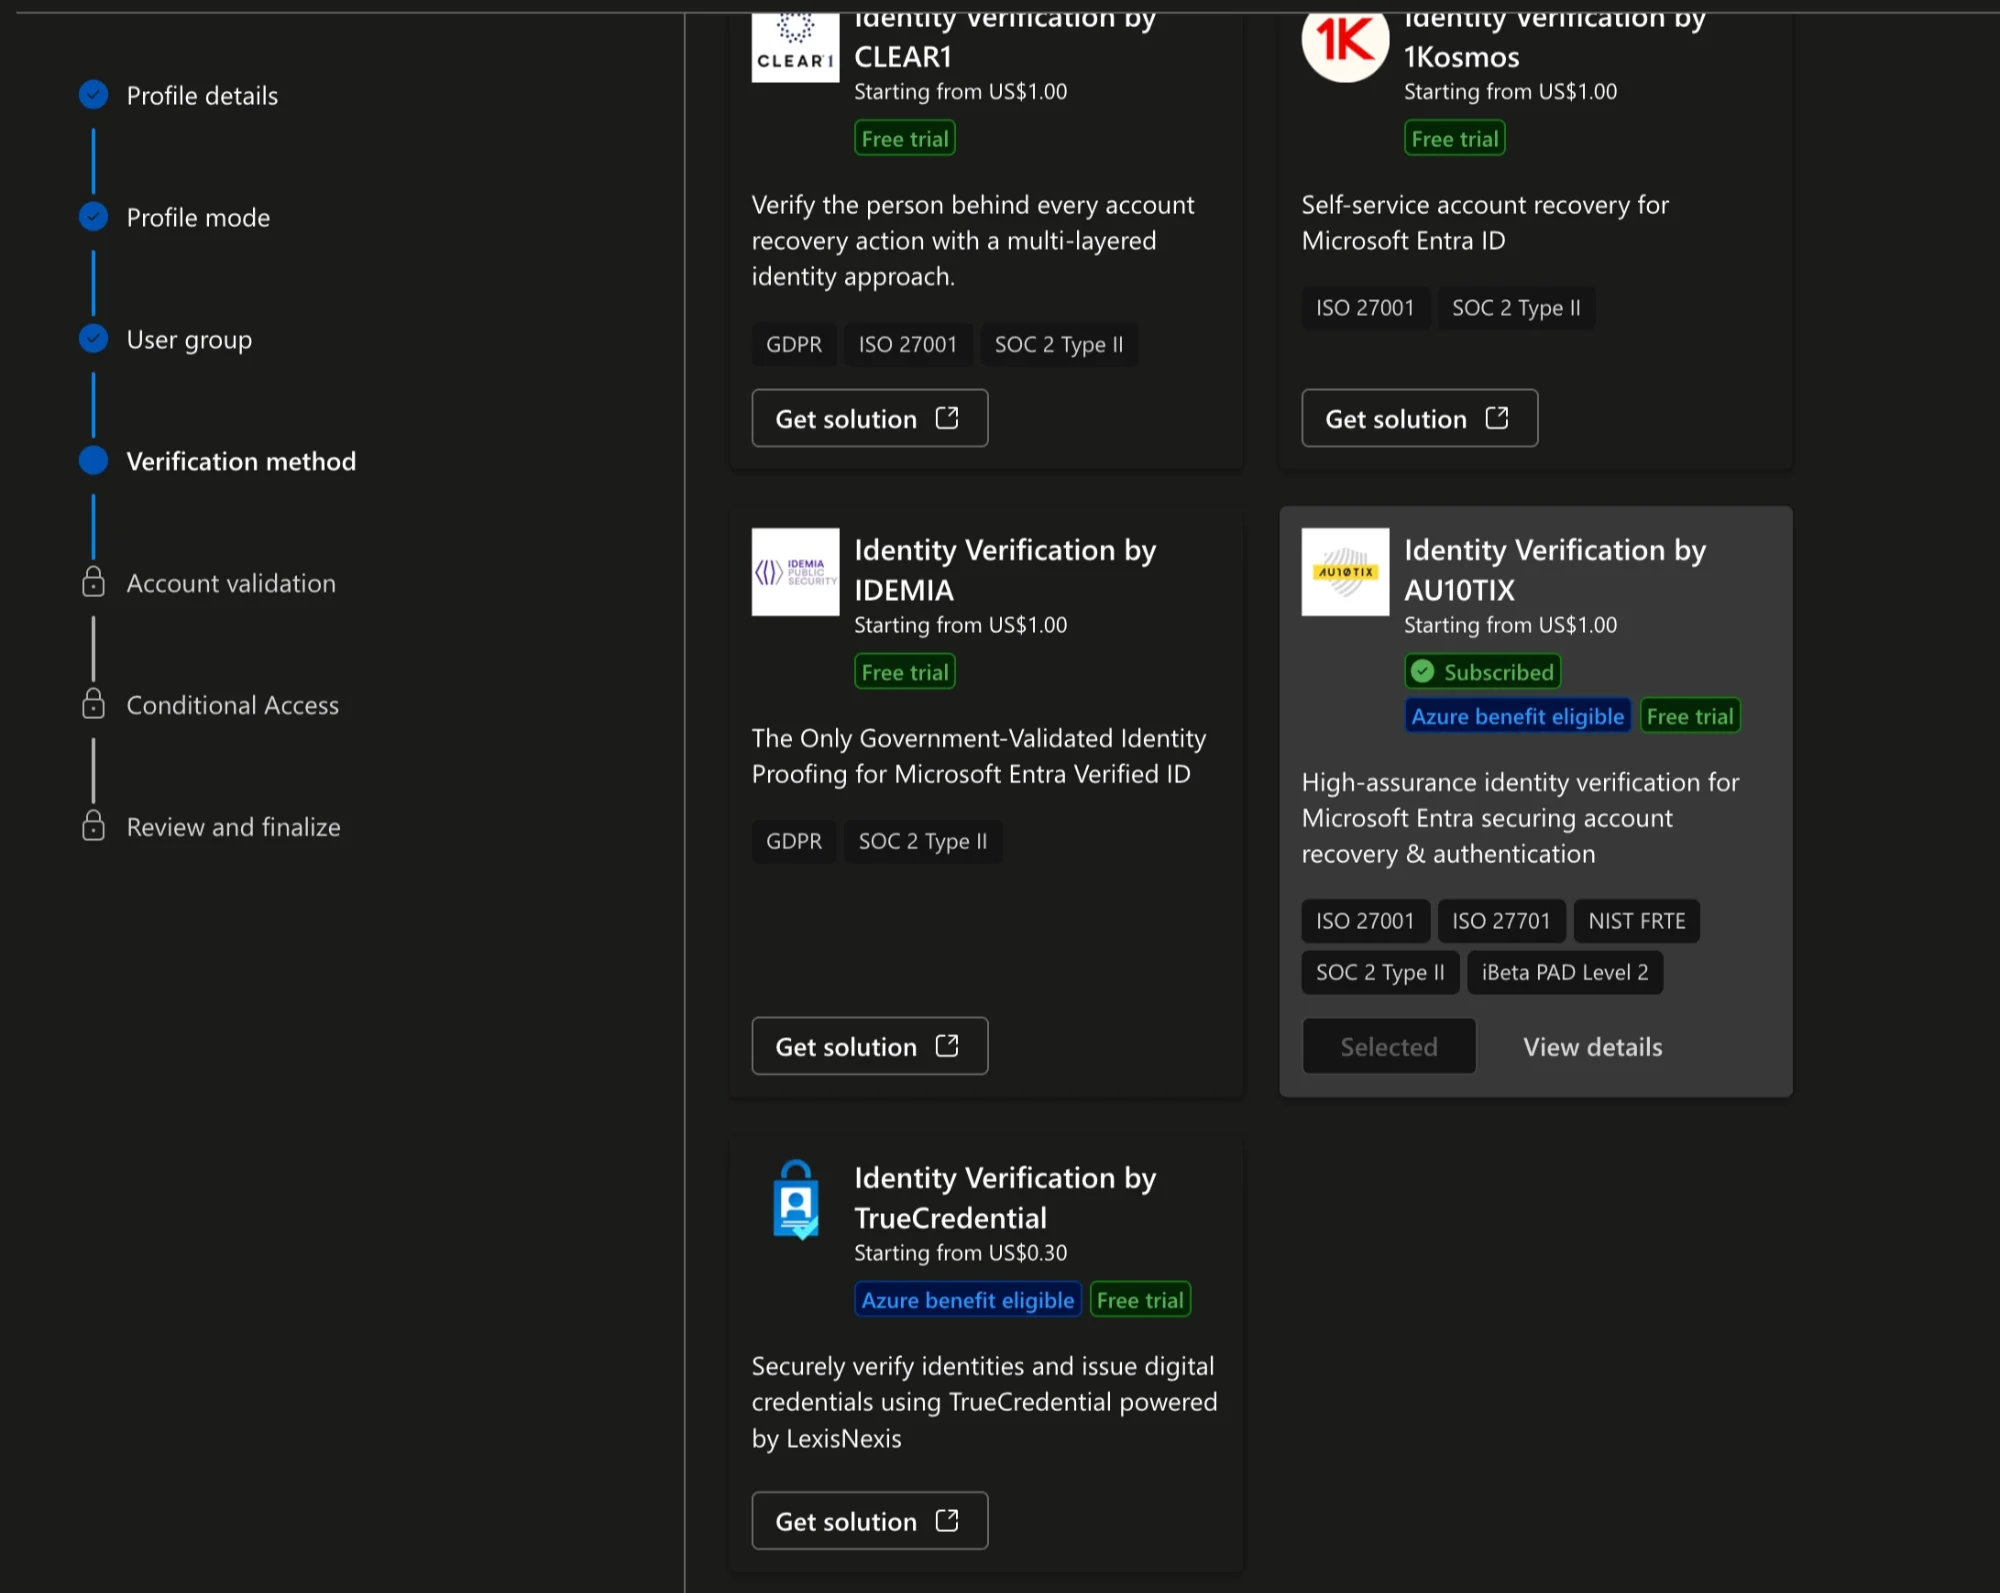
- An identity verification provider: a third-party service from the Microsoft Security Store that checks the user's government-issued ID and a live selfie, then issues a Verified ID to the user. You order it in the Security Store with an Azure subscription, then select Configure account now and activate it in the provider's admin portal. Until it's activated, you can't use it in a profile. See the list of providers and Microsoft Learn: subscribe to a provider.
- A tenant-issued credential: a Verified ID that your own organization issues, such as Verified Employee.
- A test group with a test user who has Microsoft Authenticator on a supported device.
- The test user's First name and Last name filled in on their user account in Microsoft Entra ID (Entra ID → Users → the user → Properties), matching the names on their identity document.
1. Complete Getting started
-
In the Microsoft Entra admin center, go to Verified ID → Identity verification profiles.
-
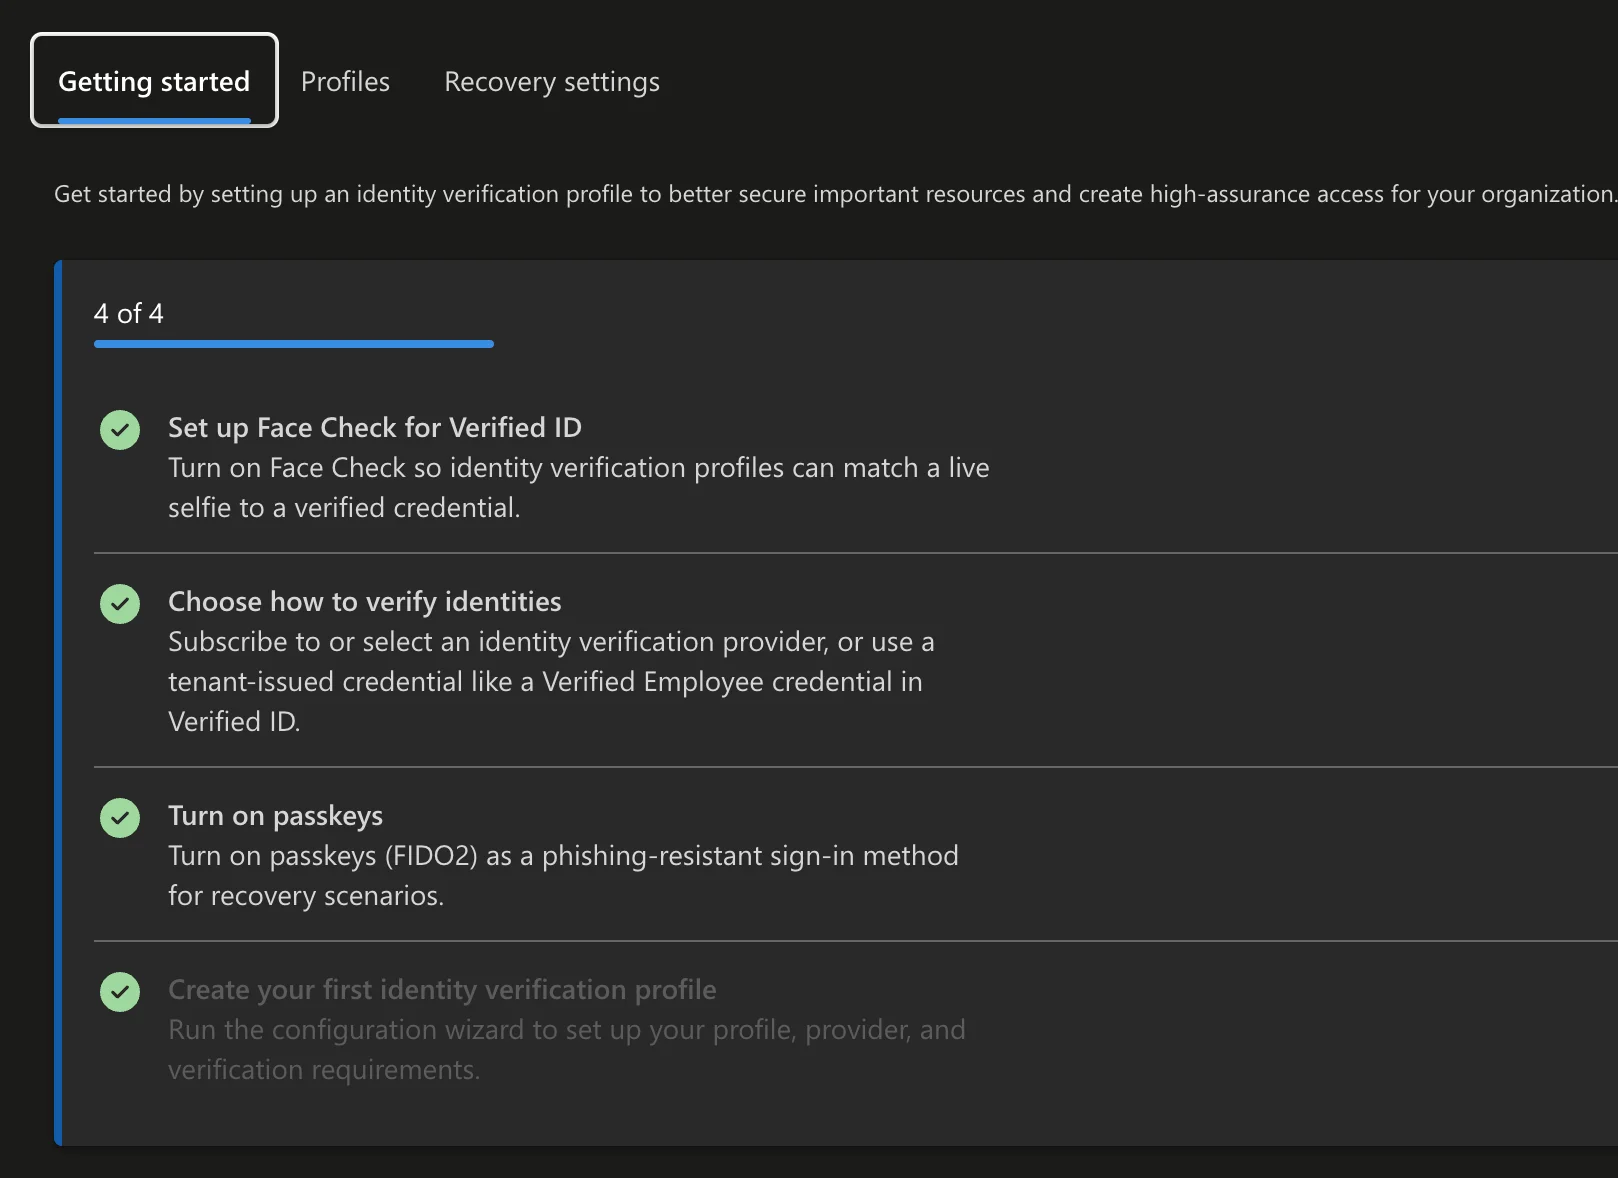
Open Getting started and complete the prerequisites in the checklist:
- Set up Face Check for Verified ID.
- Choose how to verify identities: select or subscribe to a provider, or use a tenant-issued credential such as Verified Employee.
- Turn on passkeys: enable passkeys (FIDO2) for recovery scenarios.
The last item, Create your first identity verification profile, is the next section.
2. Create an identity verification profile
Select Profiles → Create profile. If you have no profiles yet, you can also start the wizard from Getting started. Microsoft's account recovery guide shows an earlier version of this wizard, without the purpose and Conditional Access steps.
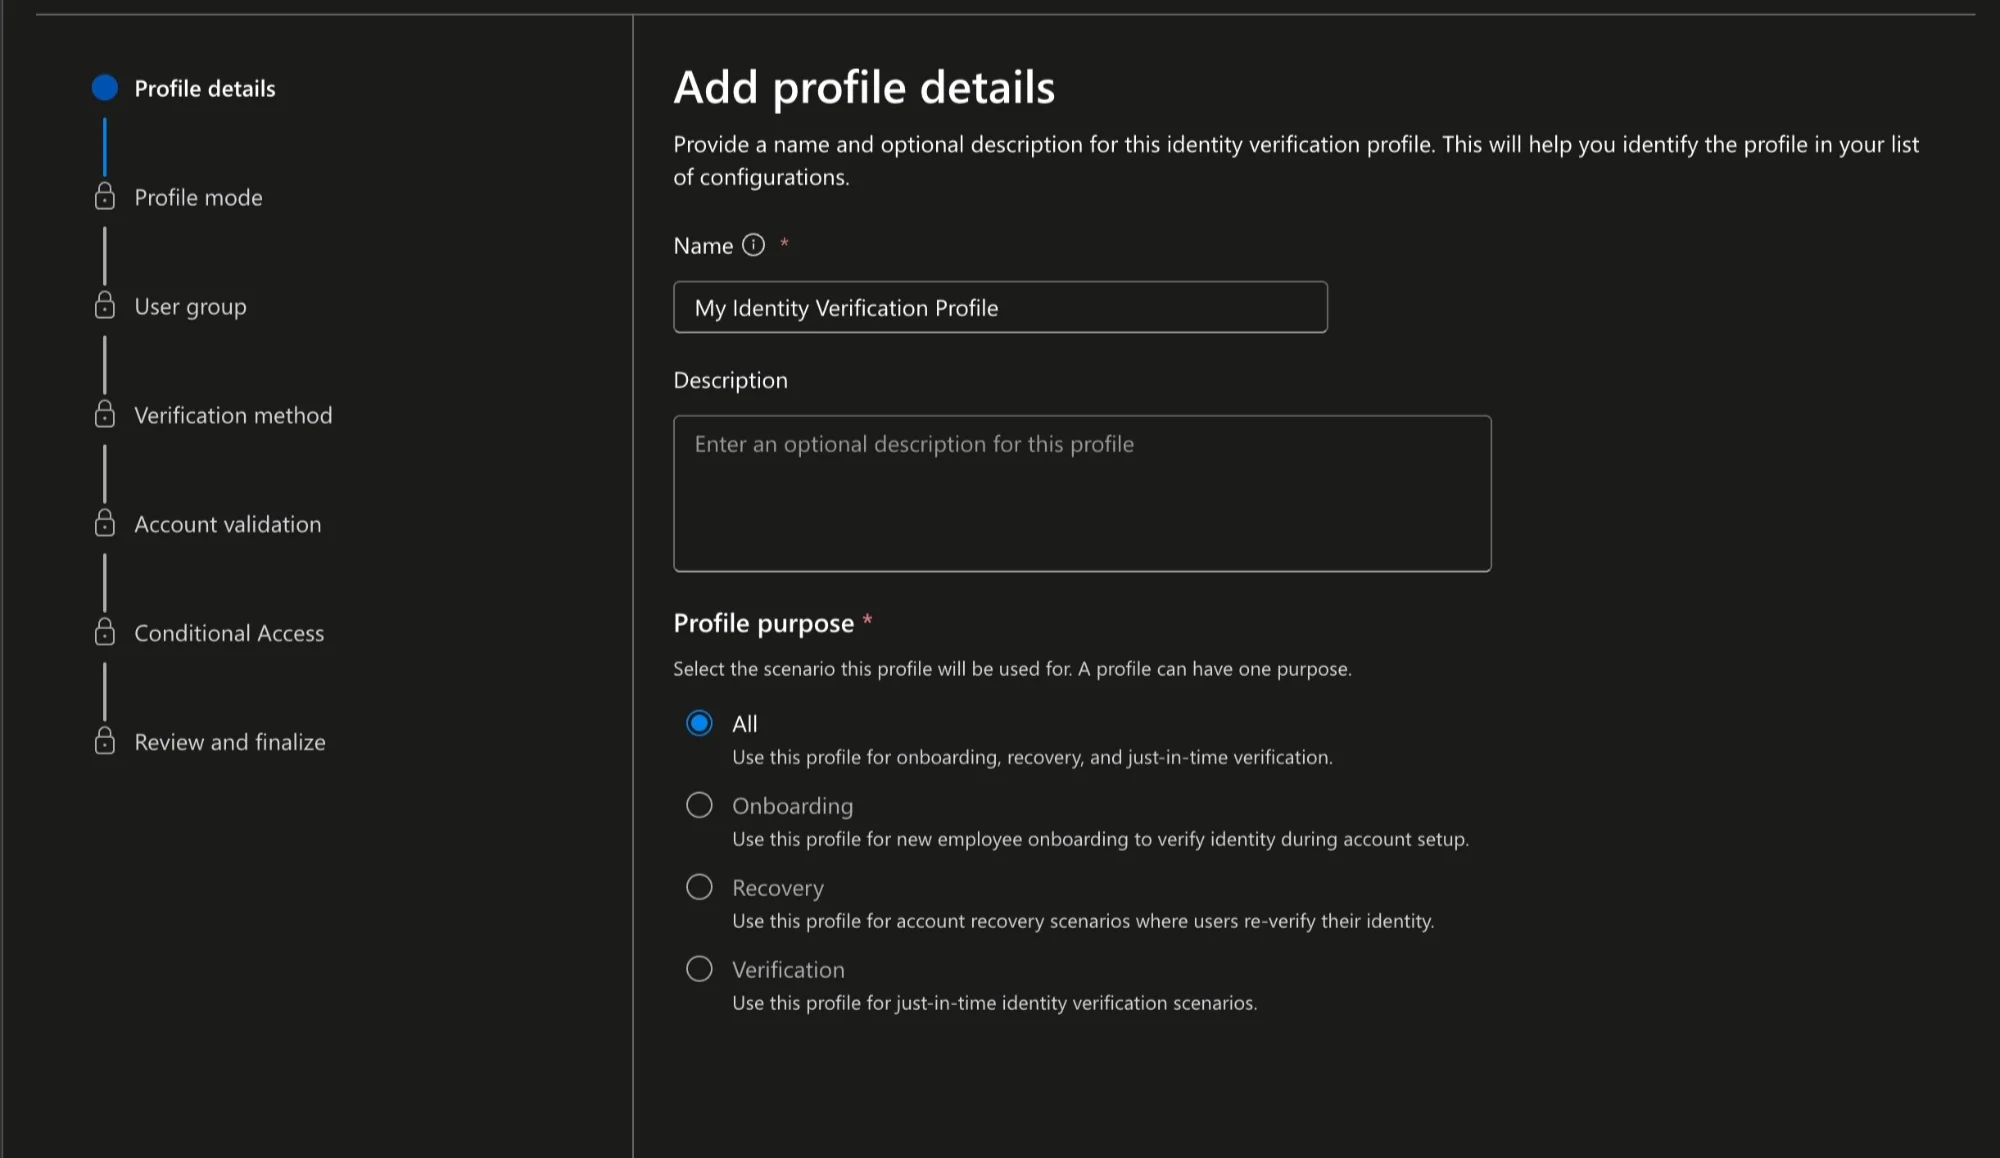
Profile details: Enter a name and choose a purpose. The purpose decides which verification methods you can use.
IMPORTANT
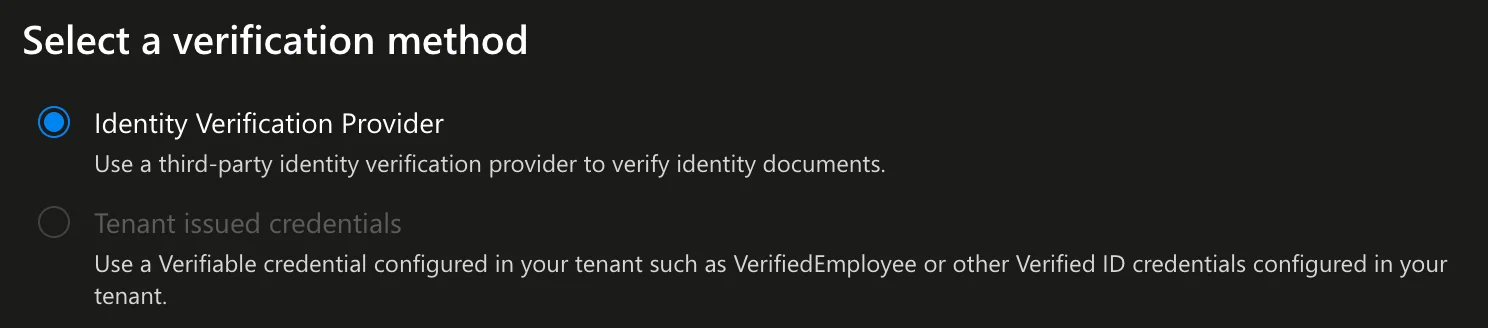
At the time of writing, the purpose limits which verification methods are available. All, Onboarding, and Recovery only support an identity verification provider. Verification also supports tenant-issued credentials, such as Verified Employee.
This example uses All with a provider, so the same profile works for onboarding, recovery, and Conditional Access.
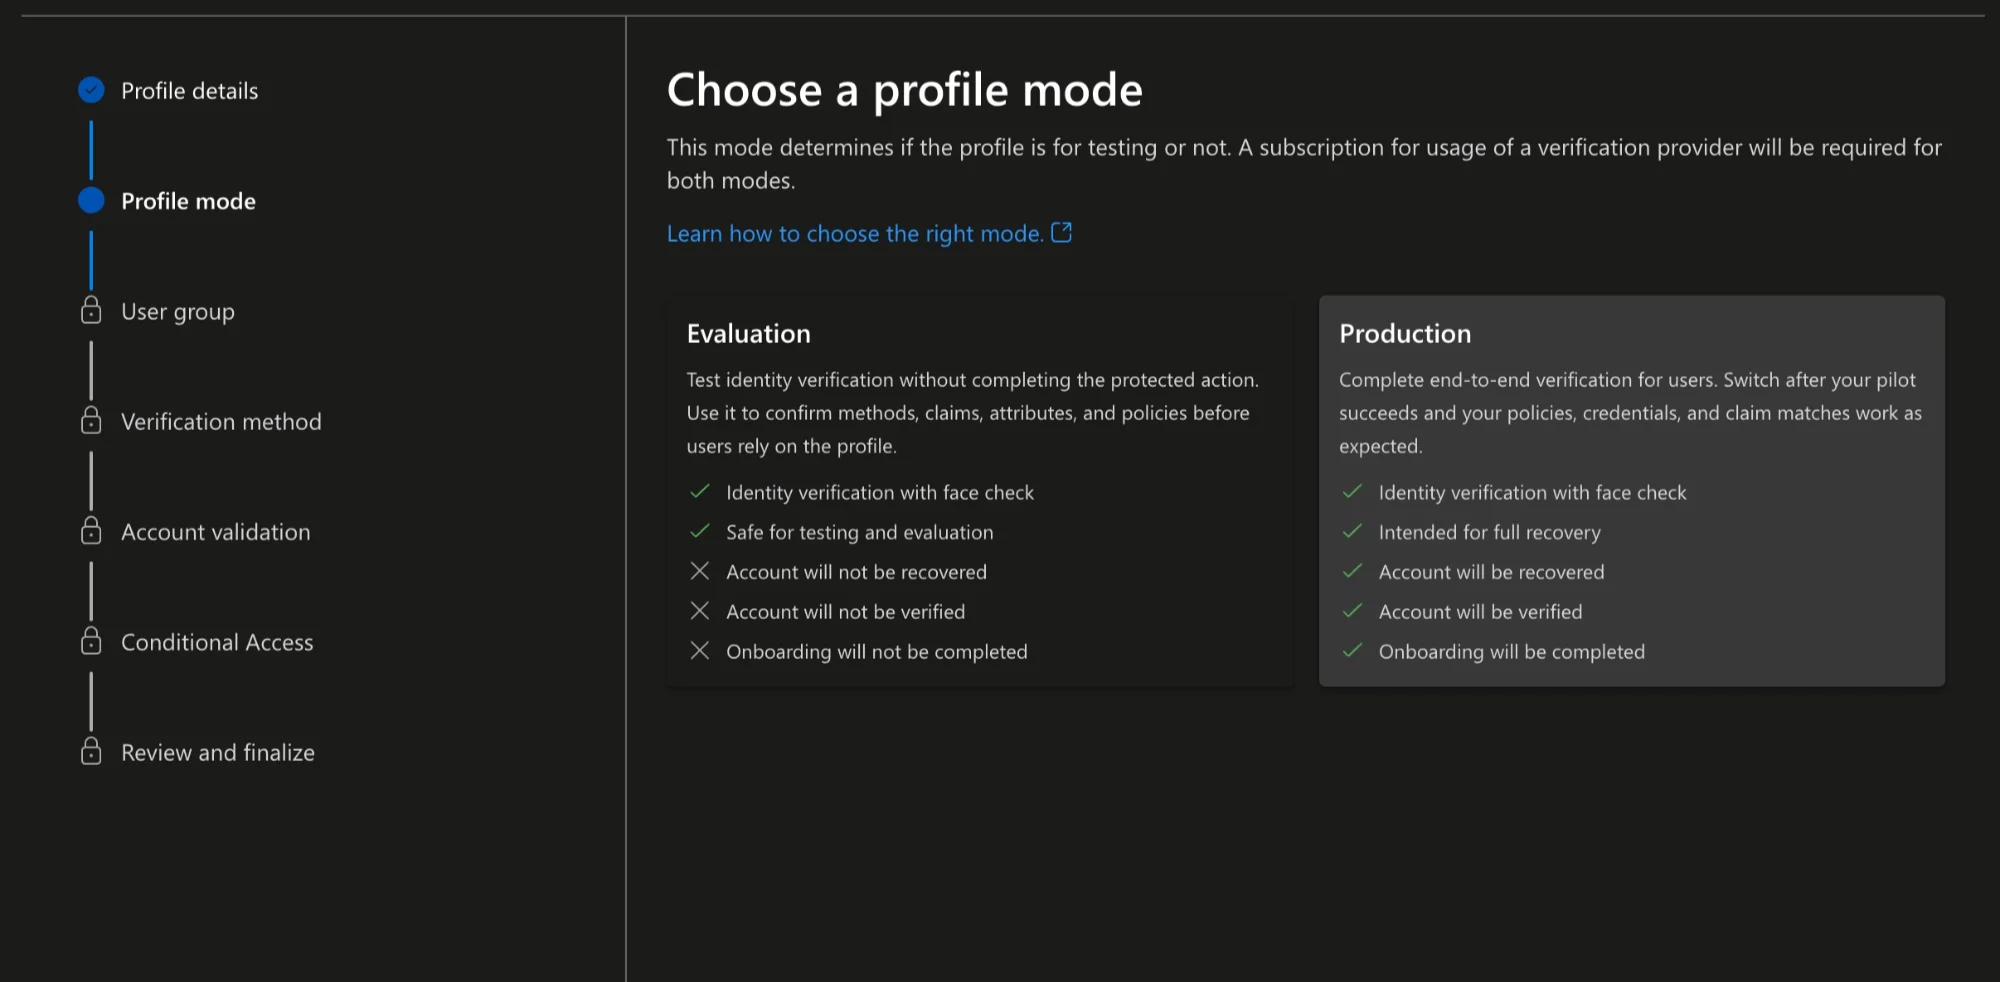
Profile mode: Both modes require a subscription to your verification provider. Evaluation runs identity verification with Face Check, but the account isn't recovered, verified, or onboarded. Production lets verification complete. It doesn't require verification on its own; that's what the Conditional Access policy is for. Microsoft recommends starting in Evaluation, but an Evaluation profile can't complete a Conditional Access check, so this example uses Production with a small test group. With All in Production, users in the group can also recover their account with this profile.
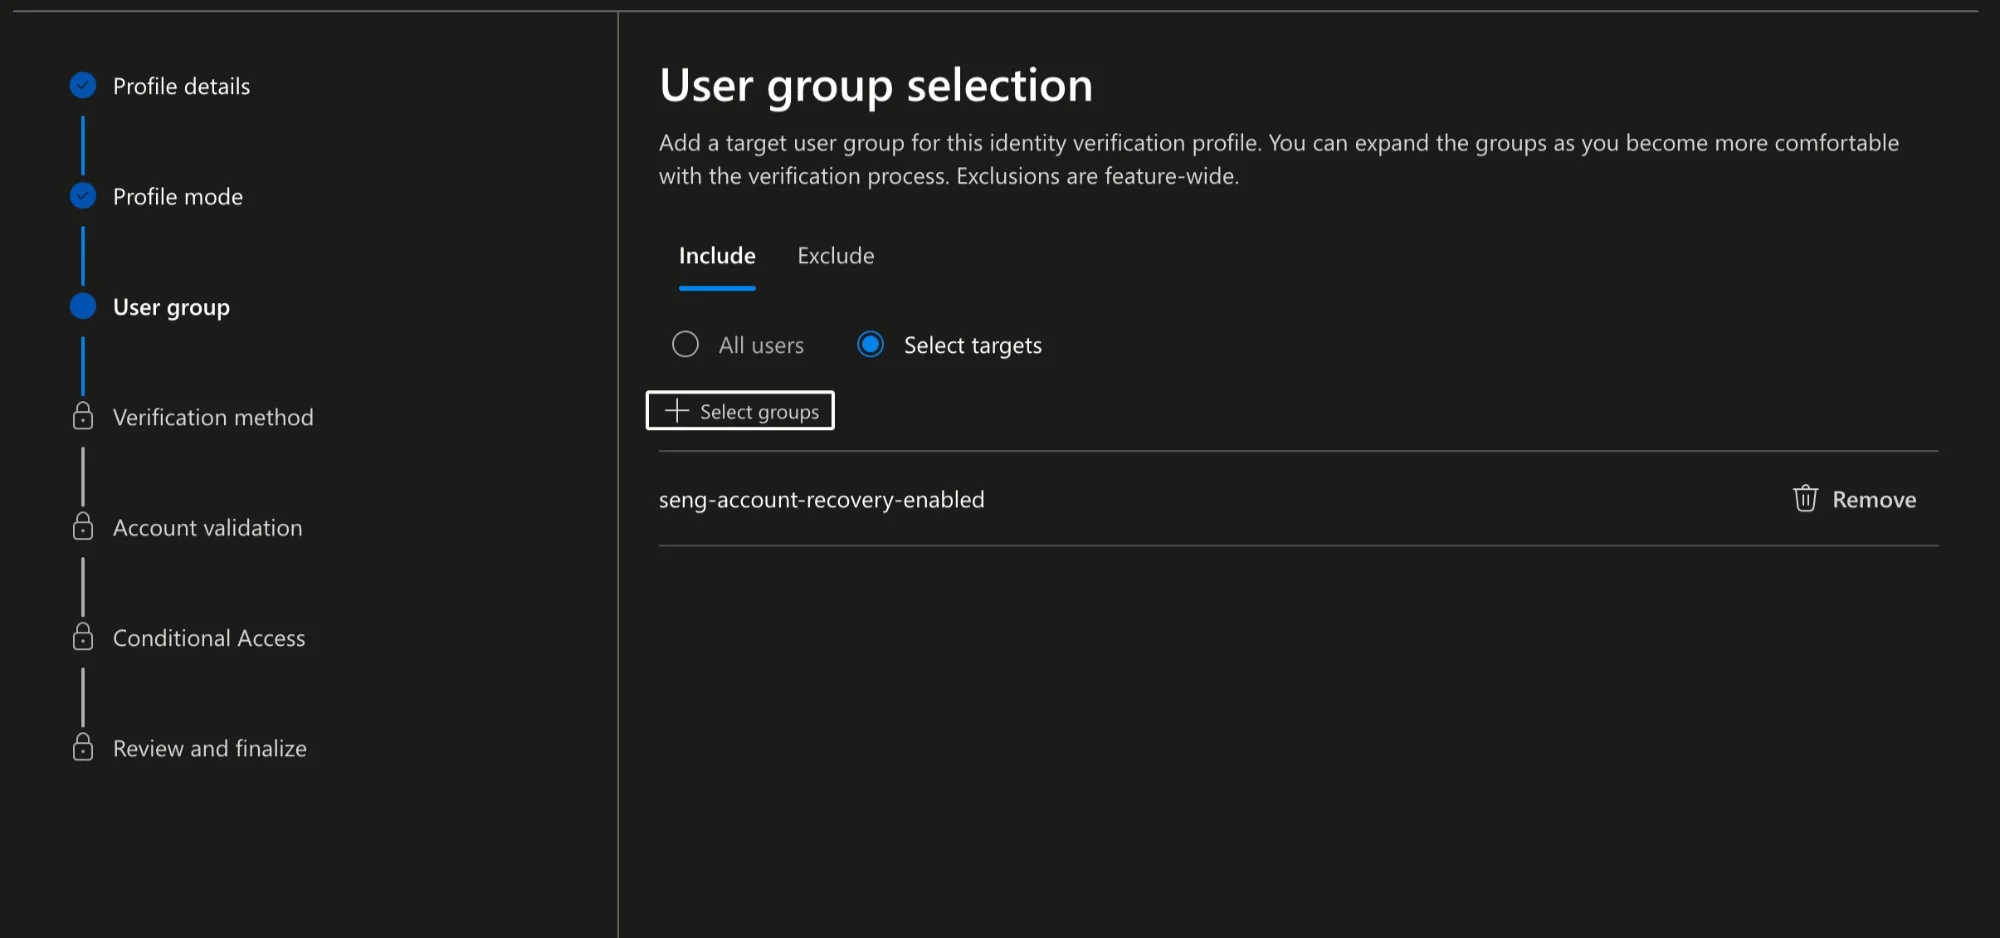
User group: Select your test group. Groups on the Exclude tab are excluded from every profile, not only this one.
Verification method: This example uses Identity Verification Provider with a subscribed provider. A provider checks a government-issued ID and usually bills per verification. A tenant-issued credential avoids that cost, but it only proves what your organization attested when it issued the credential, and it must include a photo for Face Check.
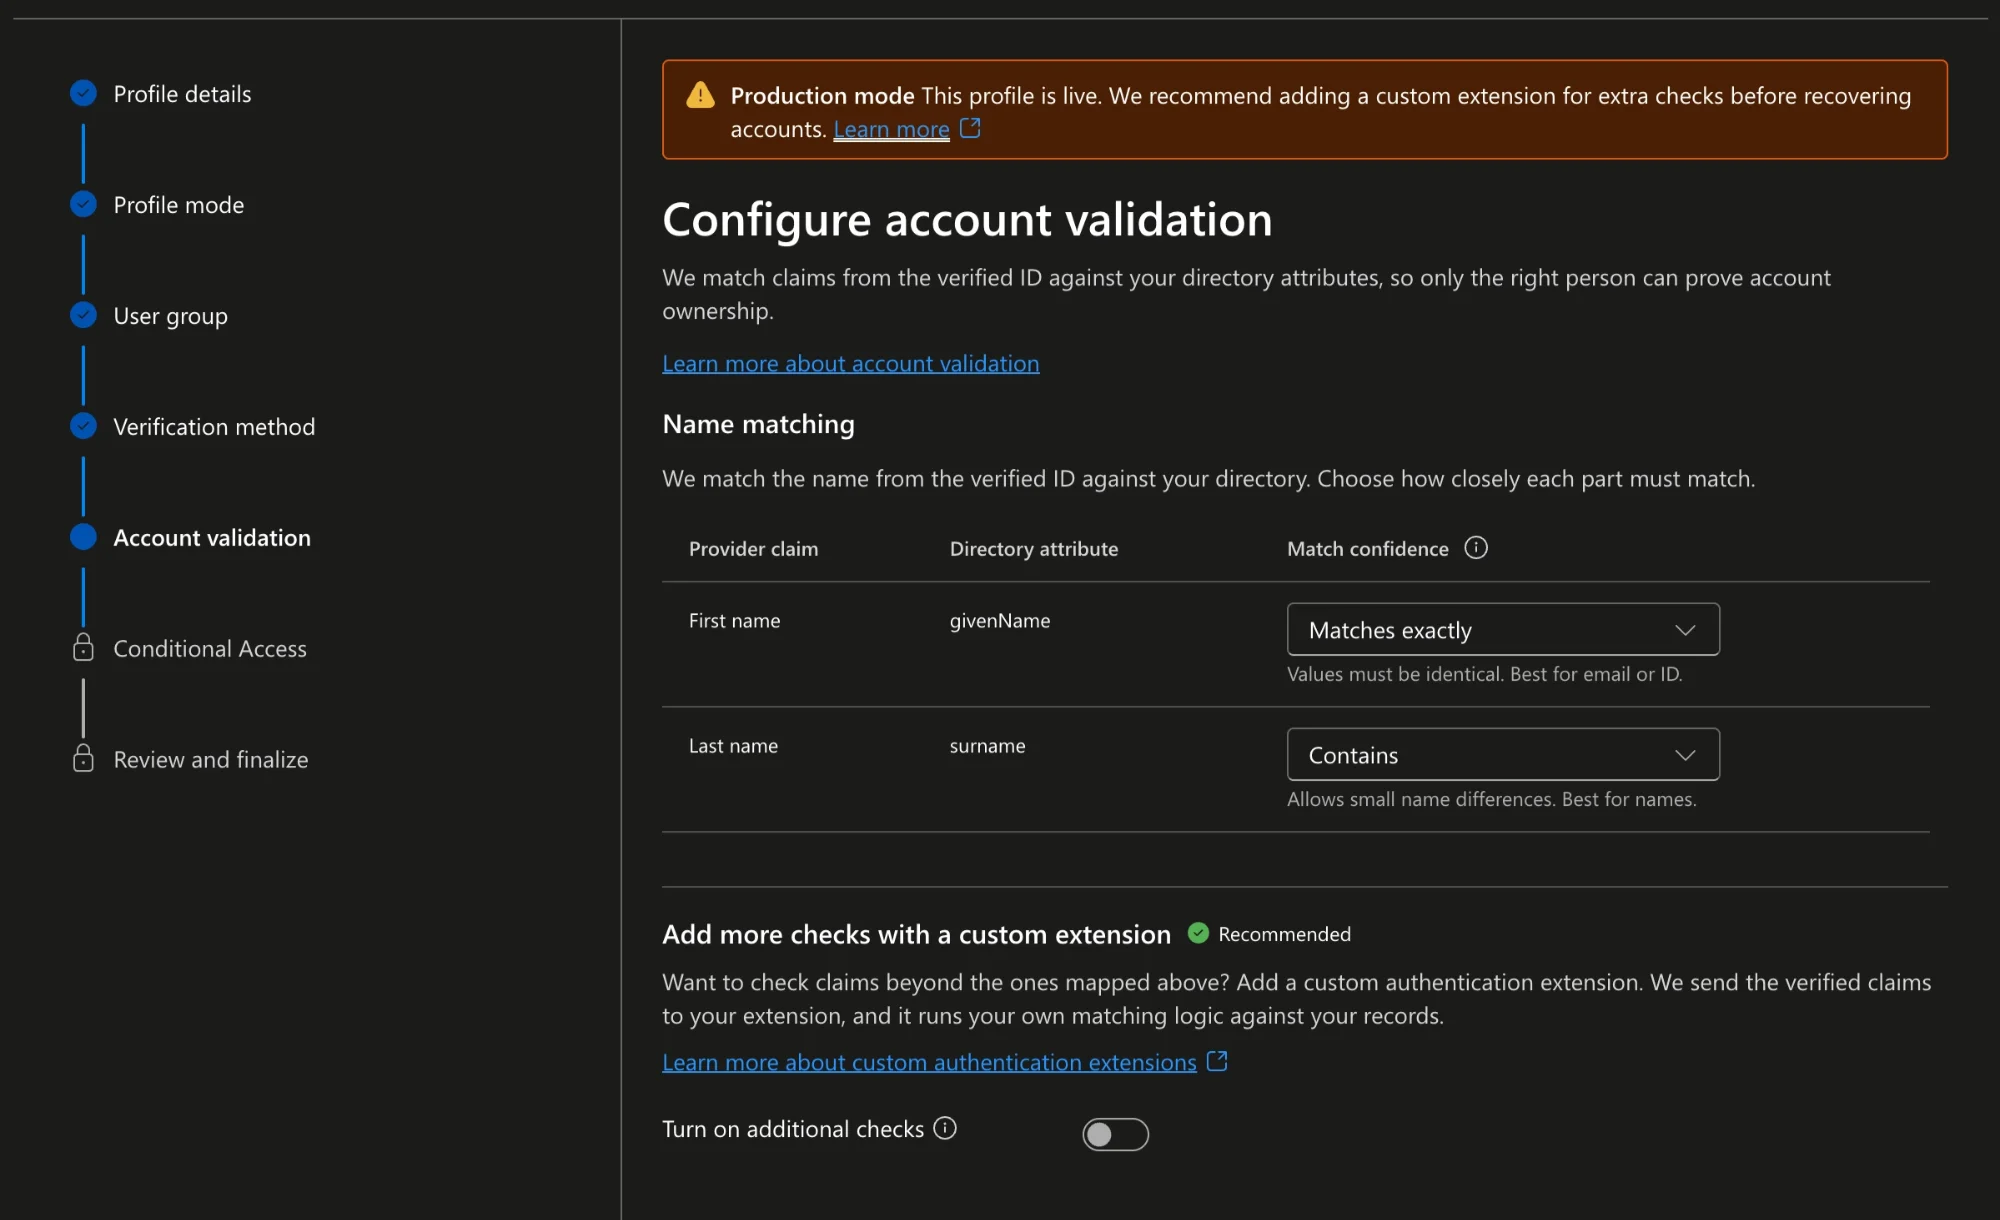
Account validation: Configure name matching and any additional checks.
TIP
The provider's first and last name claims are matched against the user's Entra ID givenName and surname attributes—not their display name. For each claim, choose Matches exactly or Contains, which allows small differences. Microsoft Learn still describes the earlier wizard, with one Exact or Relaxed setting for the profile, where relaxed matching compares words across both name fields. Microsoft Learn: account recovery matching
Microsoft recommends a custom authentication extension for Production. Name matching alone isn't reliable for larger groups, and users who share a name may be blocked. The extension checks additional claims against your own records; see Microsoft Learn: custom authentication extension for account recovery claim validation and Microsoft Entra ID Account Recovery: Claims Matching API First Impressions.
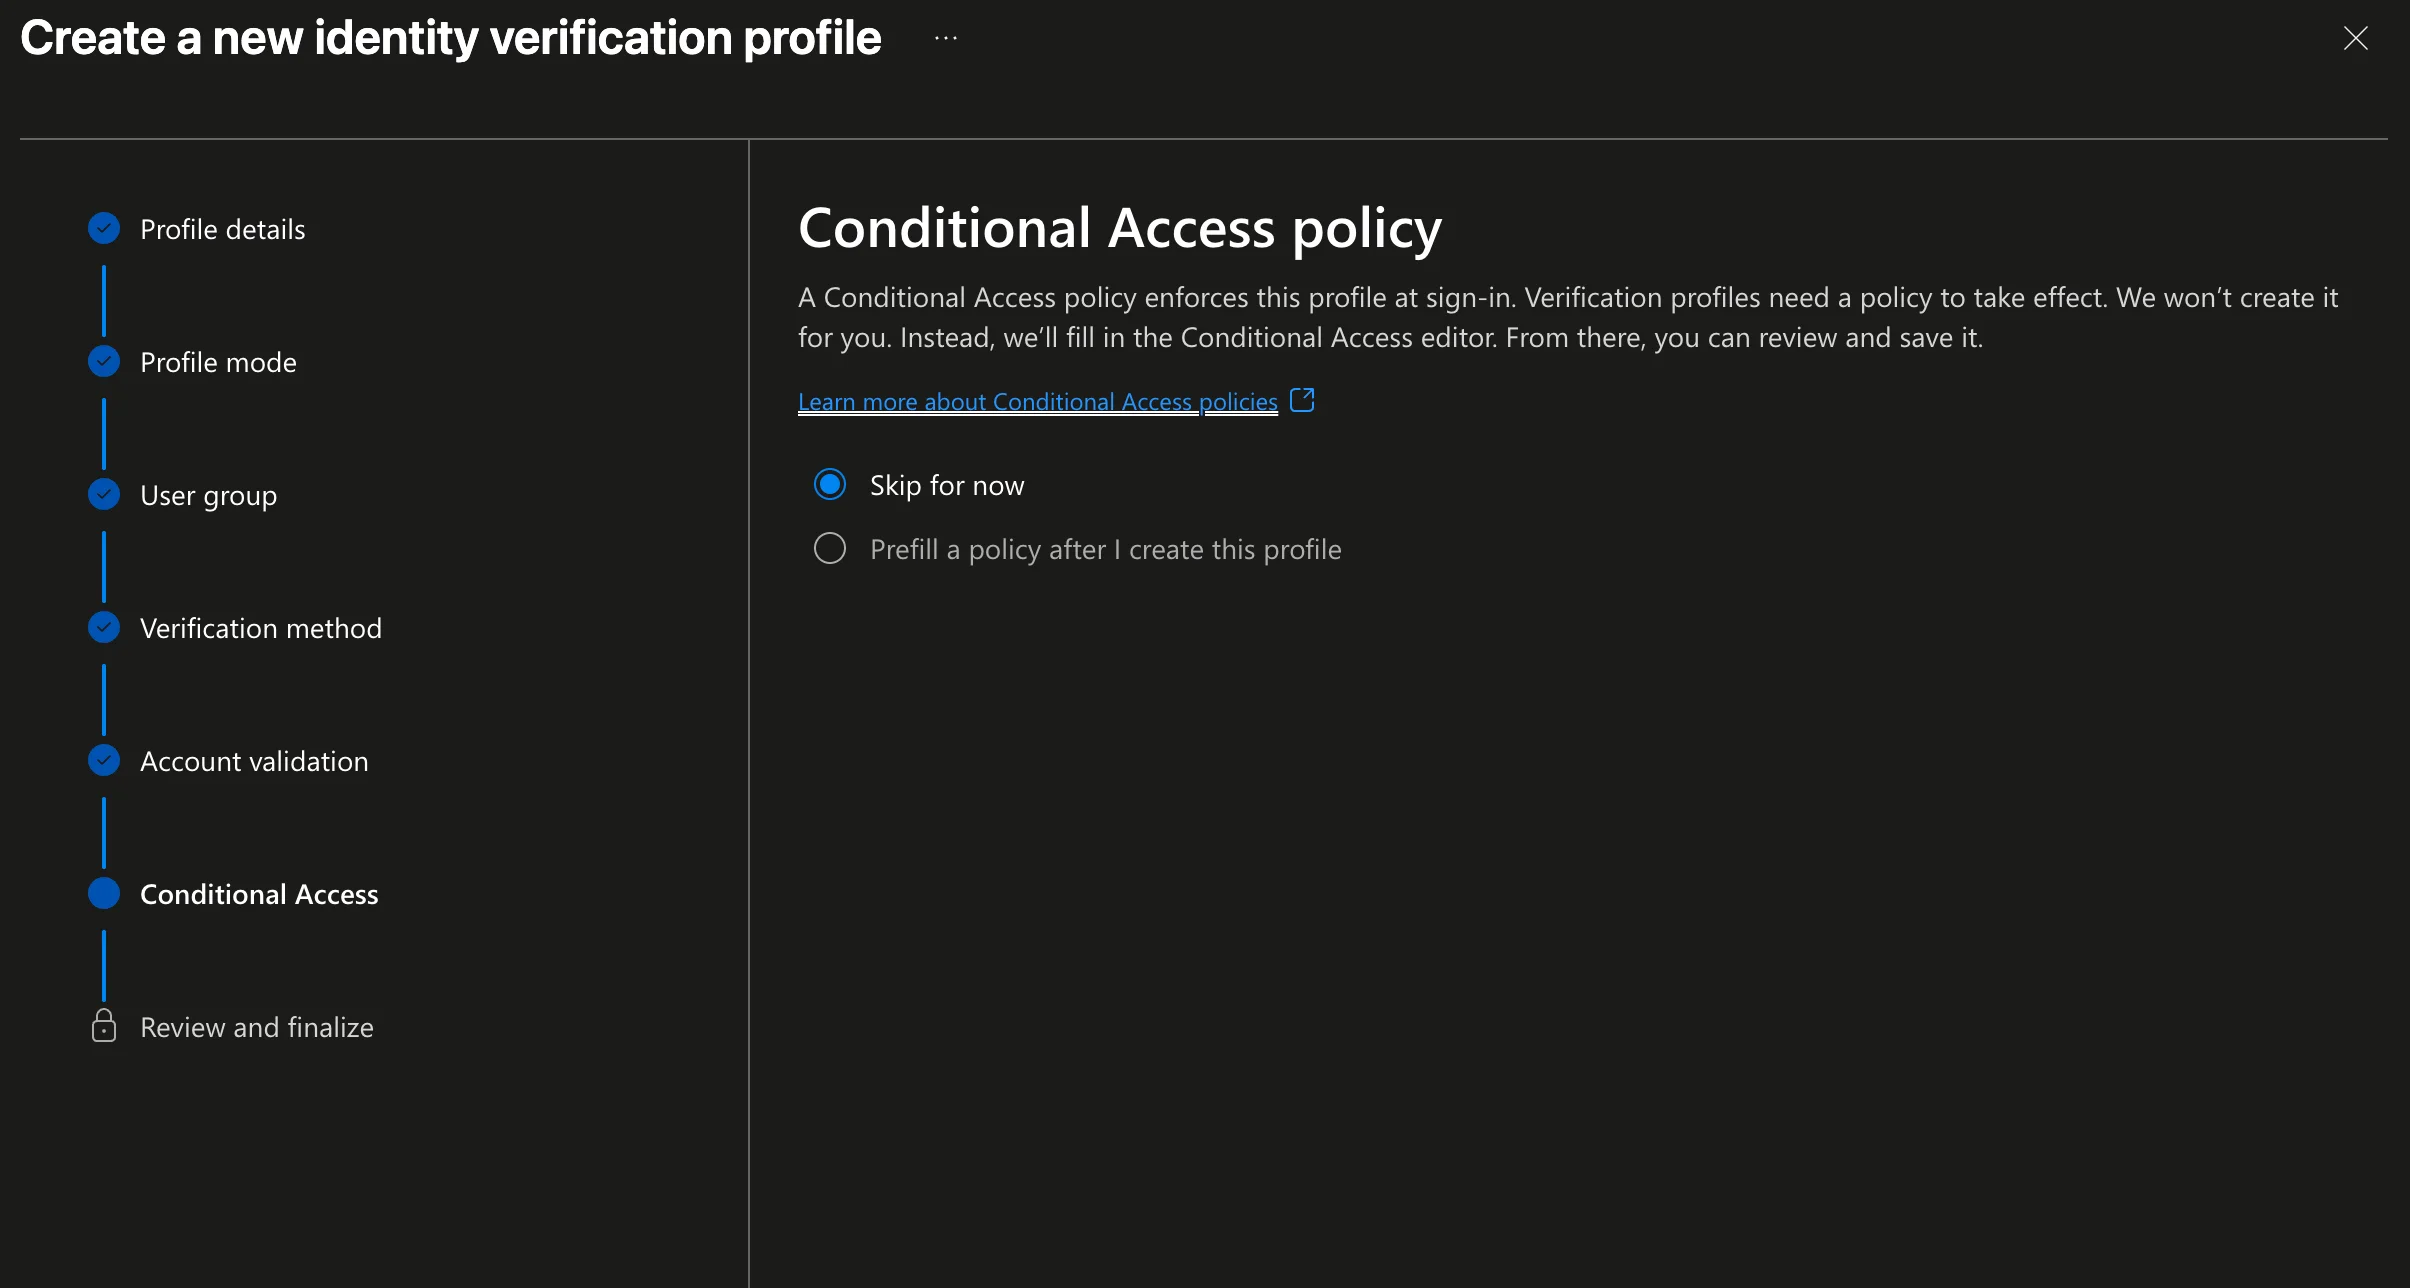
Conditional Access: Select Skip for now. The policy is created in How to Create a Conditional Access Policy for Identity Verification. Prefill a policy after I create this profile opens a draft in the Conditional Access editor for you to review and save; it doesn't create the policy.
Review and finalize: Check the settings and create the profile.
3. Confirm Verified ID is enabled for the group
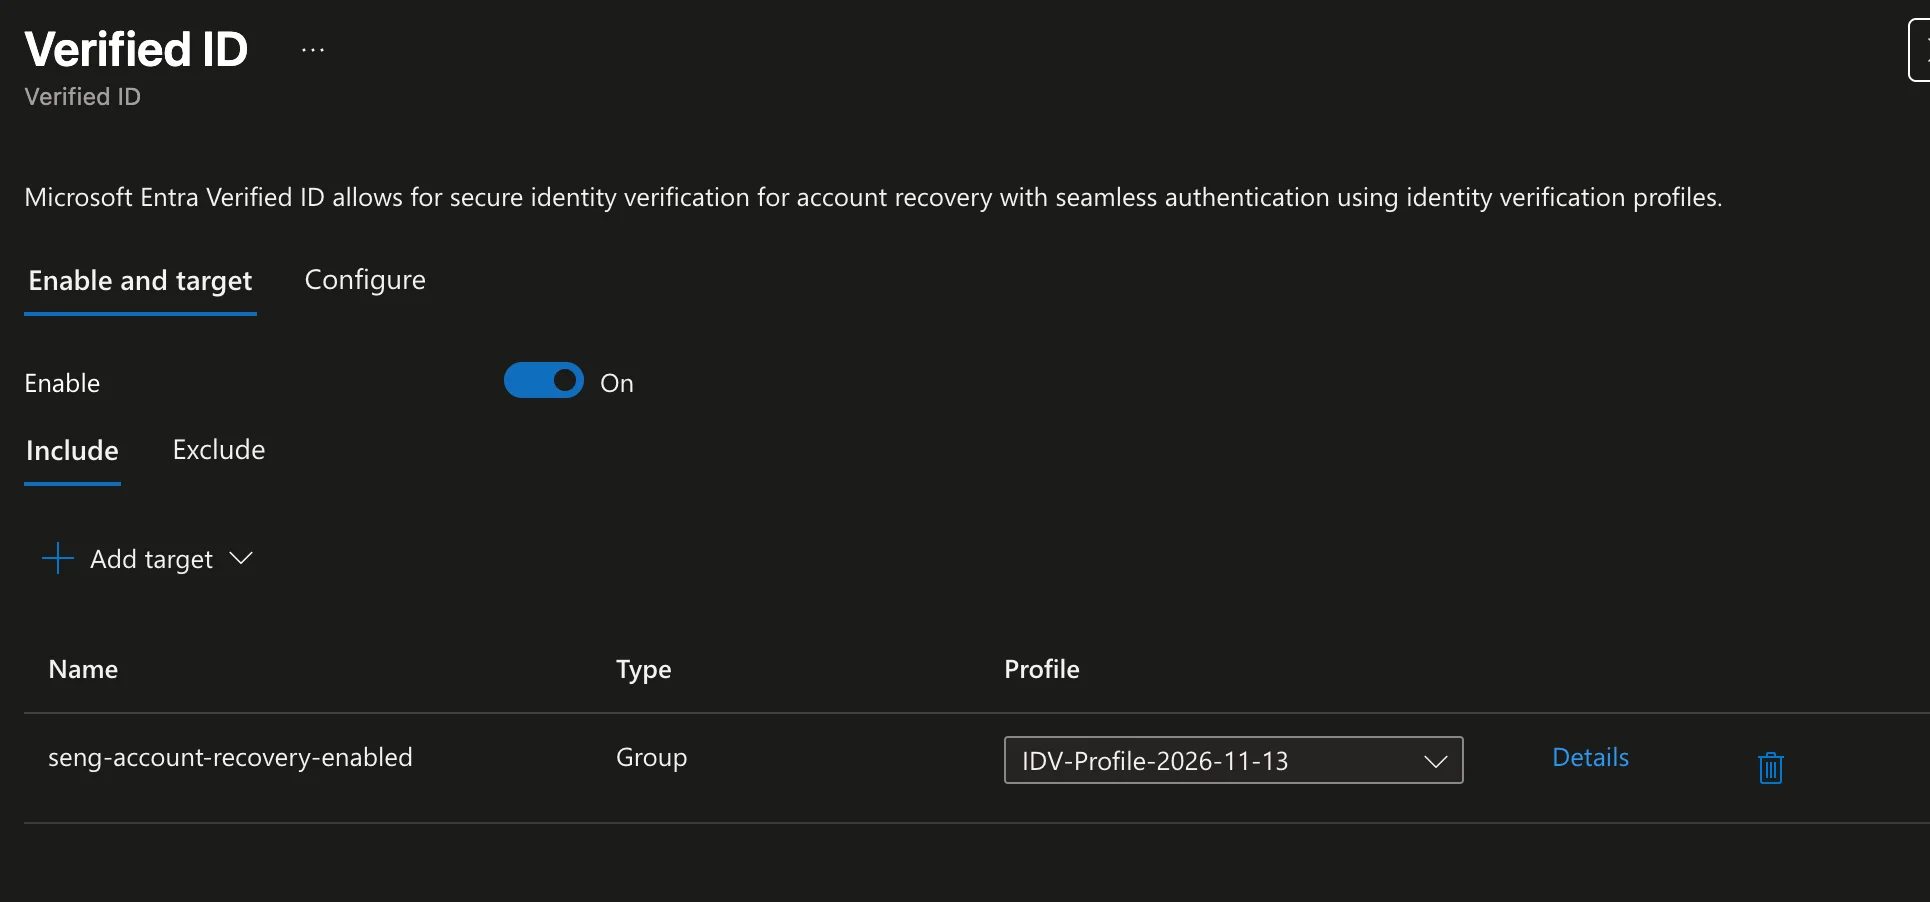
The wizard normally adds your group to the Verified ID authentication method policy. Use the policy to confirm it, but make changes in the profile, as Microsoft recommends:
- Go to Entra ID → Authentication methods → Policies → Verified ID.
- Under Enable and target, check that the method is On and your test group is listed.
- Check that the group uses the profile you created. If the group or profile is missing, edit the profile's User group step instead of adding it here.
Next steps
You now have a profile for your test group, and Verified ID is enabled for that group. Users need a Verified ID in Microsoft Authenticator before they can present it, so also test with a user who doesn't have one yet.
- To require verification for a resource: How to Create a Conditional Access Policy for Identity Verification
- To see what users experience: Get a Verified ID from an Identity Verification Provider and Present a Verified ID When Required
- To use the profile for self-service recovery: Microsoft Entra ID Account Recovery: Claims Matching API First Impressions
References
- Microsoft Learn: Verified ID identity verification overview
- Microsoft Learn: Account recovery overview
In this series
- How to Require Identity Verification on a SharePoint Site: overview
- How to Apply an Authentication Context to a SharePoint Site
- How to Create an Identity Verification Profile (this post)
- How to Create a Conditional Access Policy for Identity Verification
- Get a Verified ID from an Identity Verification Provider
- Present a Verified ID When Required